Client Side Solana 101: From Web2 Dev to Web3 Builder
Master the basics of Solana development! Learn the 'Everything is an Account' model, set up your local CLI, and mint your first token using JavaScript.
Introduction
Are you a web developer curious about diving into the world of Web3? Welcome to your gateway into Solana development! This comprehensive guide will take you from absolute beginner to building your first Solana application, all from your local machine.
Whether you're coming from React, Node.js, or any other web development background, Solana's developer-friendly ecosystem makes it surprisingly accessible. By the end of this tutorial, you'll understand how Solana works, have a fully configured development environment, and even create your first token!
What is Solana? Understanding the Blockchain Revolution
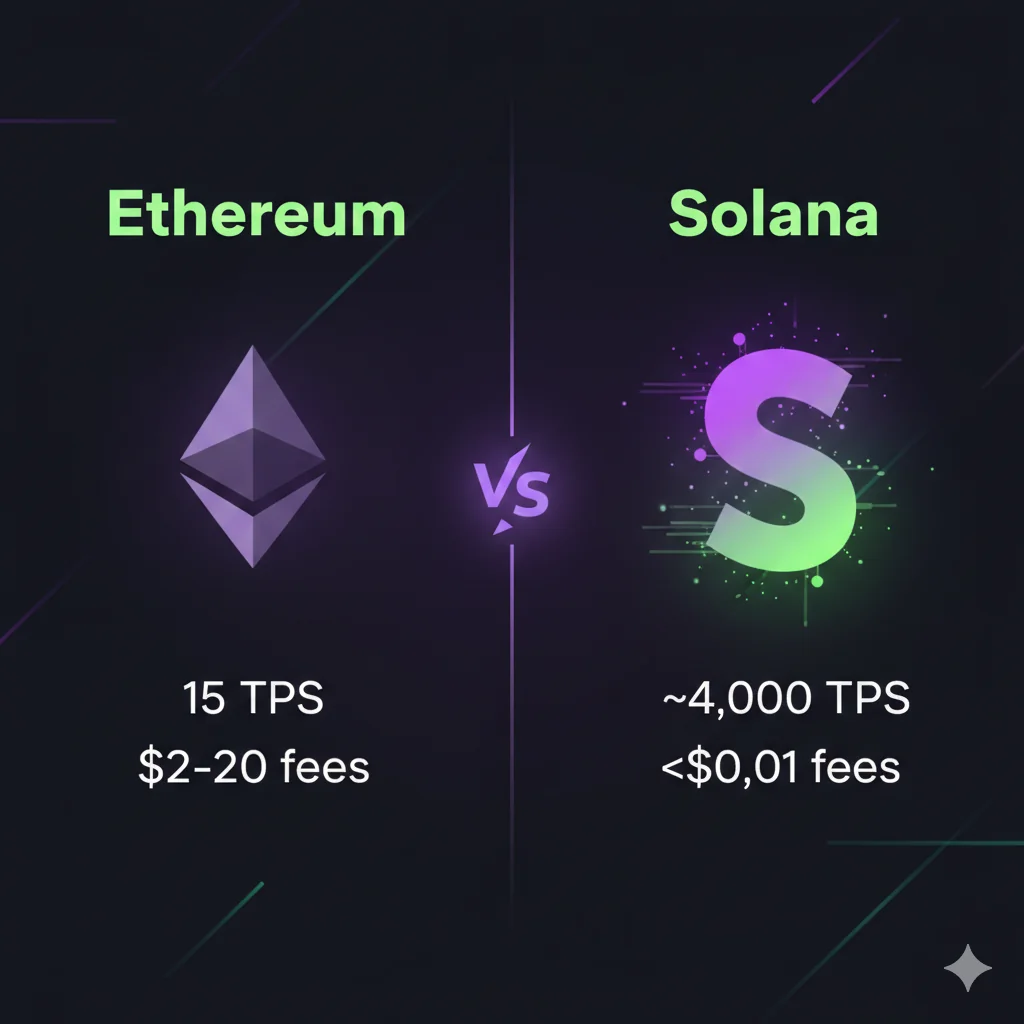
Solana is a high-performance blockchain platform designed to handle thousands of transactions per second while maintaining low fees. Think of it as the "internet-speed" blockchain that bridges the gap between traditional web applications and decentralized systems.
Why Solana Stands Out
Speed & Cost: Solana handles ~4,000 TPS in practice (theoretically up to 65,000) with fees under $0.01!
Solana's secret sauce is a combination of several innovations, but the headline one is Proof of History (PoH). PoH is not a consensus mechanism — it's a cryptographic clock. It creates a verifiable, ordered sequence of timestamps before blocks are confirmed. This lets validators agree on the order of events without constant back-and-forth communication.
The actual consensus is handled by Tower BFT, a PoH-optimised version of Practical Byzantine Fault Tolerance (PBFT). Together, PoH + Tower BFT allow Solana to process transactions at blazing speed while keeping fees dirt cheap.
The "Everything is an Account" Model
The most important concept for new Solana developers is understanding that everything is an account:
- Your wallet: An account
- Smart contracts (Programs): Accounts
- Token balances: Accounts
- NFT metadata: Accounts
// A simplified view of how accounts work
pub struct Account {
    pub lamports: u64,        // Balance in lamports (1 SOL = 1,000,000,000 lamports)
    pub data: Vec<u8>,        // Raw data stored in the account
    pub owner: Pubkey,        // Program that owns this account
    pub executable: bool,     // Whether this account is a program
}
Think of it like this: If traditional databases have tables and rows, Solana has accounts and data. Every piece of information lives in an account!
A note on Rent: Solana used to charge "rent" to keep accounts alive. Today, all new accounts must be rent-exempt — meaning you deposit a small, one-time amount of SOL (based on data size) that you get back when you close the account. Think of it as a refundable deposit, not an ongoing fee.
A Quick Dive into Web3 & Tokens
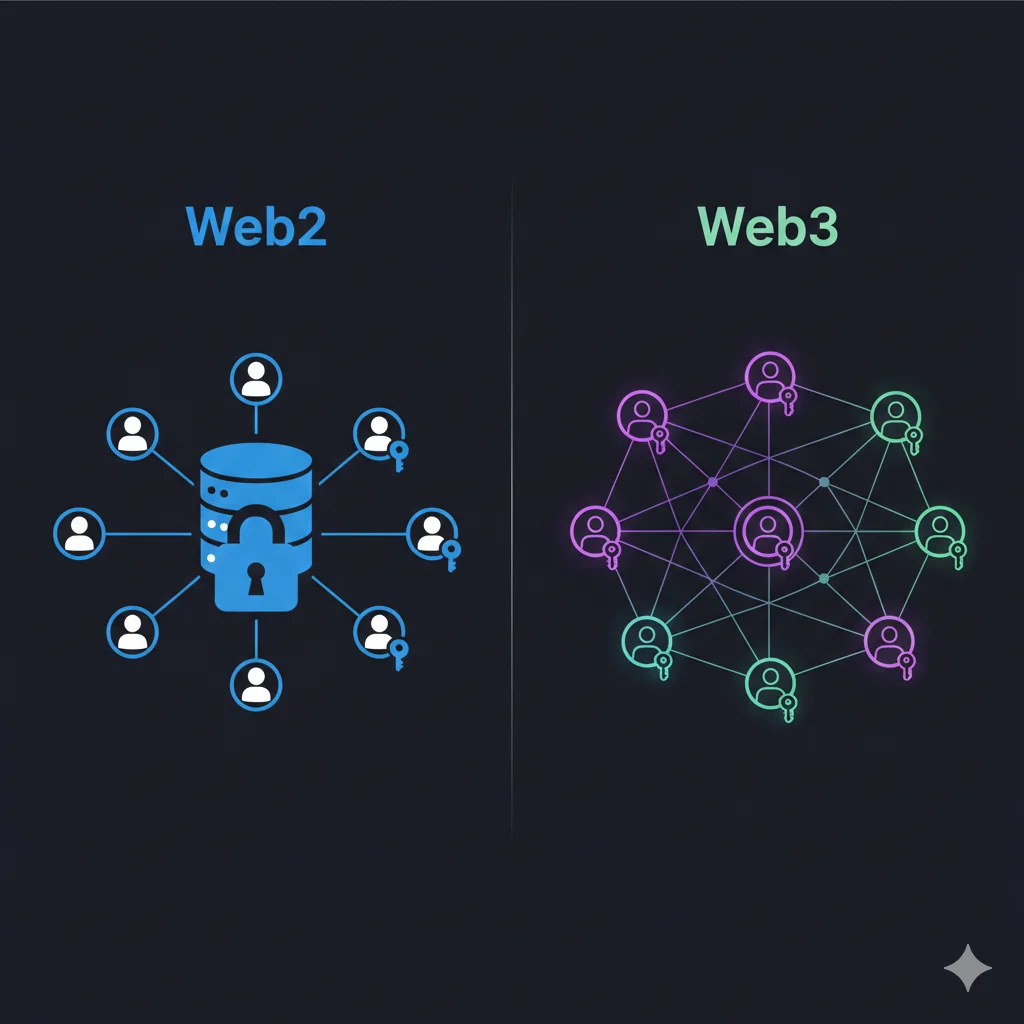
Web2 vs Web3: The Fundamental Shift
Before diving into Solana development, let's understand what makes Web3 different:
| Aspect | Web2 | Web3 |
|---|---|---|
| Data Ownership | Platform-controlled | User-controlled |
| Authentication | Username/Password | Cryptographic Keys |
| Payments | Credit cards, PayPal | Native cryptocurrency |
| Censorship | Platform decides | Mathematically enforced rules |
Understanding Tokens on Solana
Tokens on Solana are incredibly versatile. They're not just currencies - they represent:
- Fungible Tokens: Like USDC, SOL, or your own coin
- NFTs: Unique digital assets with metadata
- Utility Tokens: Access passes, memberships, governance rights
- Real-world Assets: Tokenized stocks, real estate, or commodities
Setting Up Your Solana Development Environment
Let's get your machine ready for Solana development! We'll install the Solana CLI, set up a local validator, and create your first wallet.
Step 1: Install Solana CLI
Prerequisites: Make sure you have Node.js (v18+) and npm installed on your machine.
For macOS/Linux:
sh -c "$(curl -sSfL https://release.solana.com/stable/install)"
For Windows:
Solana CLI works best on Windows through WSL (Windows Subsystem for Linux). Open a WSL terminal and run the same Linux command:
# Inside WSL (Ubuntu recommended)
sh -c "$(curl -sSfL https://release.solana.com/stable/install)"
After installation, restart your terminal (or run source ~/.profile) so the solana command is available on your PATH.
Verify your installation:
solana --version
Step 2: Configure Your Solana CLI
Set up your CLI to work with different Solana clusters:
# Connect to devnet (perfect for testing)
solana config set --url https://api.devnet.solana.com

# Check your current configuration
solana config get
- Mainnet Beta: The live network where real SOL is used
- Devnet: Testing network with free 'play' SOL for developers
- Testnet: Stress testing network for new features
- Localnet: Your personal Solana network running locally
Step 3: Create Your First Wallet
# Generate a new keypair
solana-keygen new --outfile ~/my-solana-wallet.json

# Set this as your default wallet
solana config set --keypair ~/my-solana-wallet.json

# Check your wallet address
solana address
Security Note: Your keypair file contains your private key. Keep it safe and never share it!
Step 4: Get Some Devnet SOL
You'll need SOL to pay for transactions (even tiny amounts). Get free devnet SOL:
# Airdrop 2 SOL to your wallet on devnet
solana airdrop 2

# Check your balance
solana balance
Step 5: Set Up Local Development Environment
For faster development, you can run a local Solana validator:
# Start a local test validator (in a separate terminal)
solana-test-validator

# In another terminal, configure CLI to use localhost
solana config set --url localhost
Pro Tip: Local validator resets every time you restart it, giving you a clean testing environment!
Let's Build Something Fun: Your First Token!
Now for the exciting part - let's create and mint your very own token! We'll build a simple JavaScript application that:
- Creates a new token mint
- Creates token accounts
- Mints tokens to your wallet
- Transfers tokens between accounts
Project Setup
Create a new project directory:
mkdir my-first-solana-token
cd my-first-solana-token
npm init -y
Install the required dependencies:
npm install @solana/web3.js @solana/spl-token
Understanding the Code Structure
Before we start coding, let's understand what each library does:
- @solana/web3.js: Core Solana functionality (connections, keypairs, transactions)
- @solana/spl-token: Token-specific operations (create, mint, transfer)
Creating Your Token
Create a file called create-token.js:
const {
    Connection,
    Keypair,
    clusterApiUrl,
} = require('@solana/web3.js');

const {
    createMint,
    getOrCreateAssociatedTokenAccount,
    mintTo,
    transfer,
} = require('@solana/spl-token');

const os = require('os');
const path = require('path');
const fs = require('fs');

async function main() {
    // Connect to Solana devnet
    const connection = new Connection(clusterApiUrl('devnet'), 'confirmed');

    // Load your wallet (the one we created in Step 3)
    const walletPath = path.join(os.homedir(), 'my-solana-wallet.json');
    const secretKey = JSON.parse(fs.readFileSync(walletPath, 'utf8'));
    const payer = Keypair.fromSecretKey(new Uint8Array(secretKey));

    console.log('🚀 Creating a new token...');

    // Create a new token mint
    const mint = await createMint(
        connection,
        payer,           // Account that will pay for the transaction
        payer.publicKey, // Account that will control the minting
        null,            // Account that will control the freezing of the token (optional)
        9                // Number of decimal places
    );

    console.log('✅ Token mint created:', mint.toBase58());

    // Create a token account for your wallet
    const tokenAccount = await getOrCreateAssociatedTokenAccount(
        connection,
        payer,
        mint,
        payer.publicKey
    );

    console.log('✅ Token account created:', tokenAccount.address.toBase58());

    // Mint 1000 tokens to your account
    await mintTo(
        connection,
        payer,
        mint,
        tokenAccount.address,
        payer.publicKey,
        1000 * Math.pow(10, 9) // 1000 tokens with 9 decimal places
    );

    console.log('🎉 Minted 1000 tokens to your account!');
}

main().catch(console.error);
Note: The code above automatically reads the wallet file we created in Step 3 (~/my-solana-wallet.json). If you saved it elsewhere, update the walletPath variable.
Running Your Token Creation
node create-token.js
Adding Token Transfer Functionality
Let's extend our script to transfer tokens between accounts. Add this function to your create-token.js:
async function transferTokens(mint, fromWallet, toWallet, amount) {
    const connection = new Connection(clusterApiUrl('devnet'), 'confirmed');

    // Get or create token accounts for both wallets
    const fromTokenAccount = await getOrCreateAssociatedTokenAccount(
        connection,
        fromWallet,
        mint,
        fromWallet.publicKey
    );

    const toTokenAccount = await getOrCreateAssociatedTokenAccount(
        connection,
        fromWallet, // Payer for account creation
        mint,
        toWallet.publicKey
    );

    // Transfer tokens
    const signature = await transfer(
        connection,
        fromWallet,
        fromTokenAccount.address,
        toTokenAccount.address,
        fromWallet.publicKey,
        amount * Math.pow(10, 9) // Convert to smallest unit
    );

    console.log('🎯 Transfer signature:', signature);
}
To use this function, you'd call it after minting. For example, to send 50 tokens to another wallet:
// Generate a second wallet for testing
const recipient = Keypair.generate();

// Fund the recipient so they can hold a token account
await connection.requestAirdrop(recipient.publicKey, 1000000000);

// Transfer 50 tokens
await transferTokens(mint, payer, recipient, 50);
Creating a Simple Web Interface
Let's create a basic HTML interface to interact with our token. Create index.html:
<!DOCTYPE html>
<html>
<head>
    <title>My Solana Token</title>
    <script src="https://unpkg.com/@solana/web3.js@latest/lib/index.iife.min.js"></script>
</head>
<body>
    <div style="max-width: 600px; margin: 50px auto; padding: 20px;">
        <h1>🪙 My First Solana Token</h1>

        <div style="margin: 20px 0;">
            <button onclick="connectWallet()">Connect Wallet</button>
            <div id="walletInfo"></div>
        </div>

        <div style="margin: 20px 0;">
            <h3>Token Operations</h3>
            <button onclick="checkBalance()">Check SOL Balance</button>
            <button onclick="requestAirdrop()">Request SOL Airdrop</button>
            <div id="status"></div>
        </div>
    </div>

    <script>
        let wallet = null;
        let connection = new solanaWeb3.Connection('https://api.devnet.solana.com');

        async function connectWallet() {
            if (window.solana) {
                wallet = window.solana;
                await wallet.connect();
                document.getElementById('walletInfo').innerHTML =
                    `Connected: ${wallet.publicKey.toString().slice(0, 8)}...`;
            } else {
                alert('Please install Phantom wallet!');
            }
        }

        async function checkBalance() {
            if (!wallet) {
                alert('Please connect your wallet first!');
                return;
            }

            const balance = await connection.getBalance(wallet.publicKey);
            document.getElementById('status').innerHTML =
                `SOL Balance: ${balance / 1000000000} SOL`;
        }

        async function requestAirdrop() {
            if (!wallet) {
                alert('Please connect your wallet first!');
                return;
            }

            try {
                const signature = await connection.requestAirdrop(
                    wallet.publicKey,
                    1000000000 // 1 SOL
                );
                document.getElementById('status').innerHTML =
                    `Airdrop requested! Signature: ${signature.slice(0, 8)}...`;
            } catch (error) {
                document.getElementById('status').innerHTML =
                    `Error: ${error.message}`;
            }
        }
    </script>
</body>
</html>
Testing Your Token
- Install a Solana wallet: Download Phantom or Solflare
- Set wallet to Devnet: In wallet settings, switch to Devnet
- Open your HTML file: Open
index.htmlin your browser - Connect and test: Connect your wallet and try the operations
Congratulations! 🎉 You've just created your first Solana token and built a web interface to interact with it!
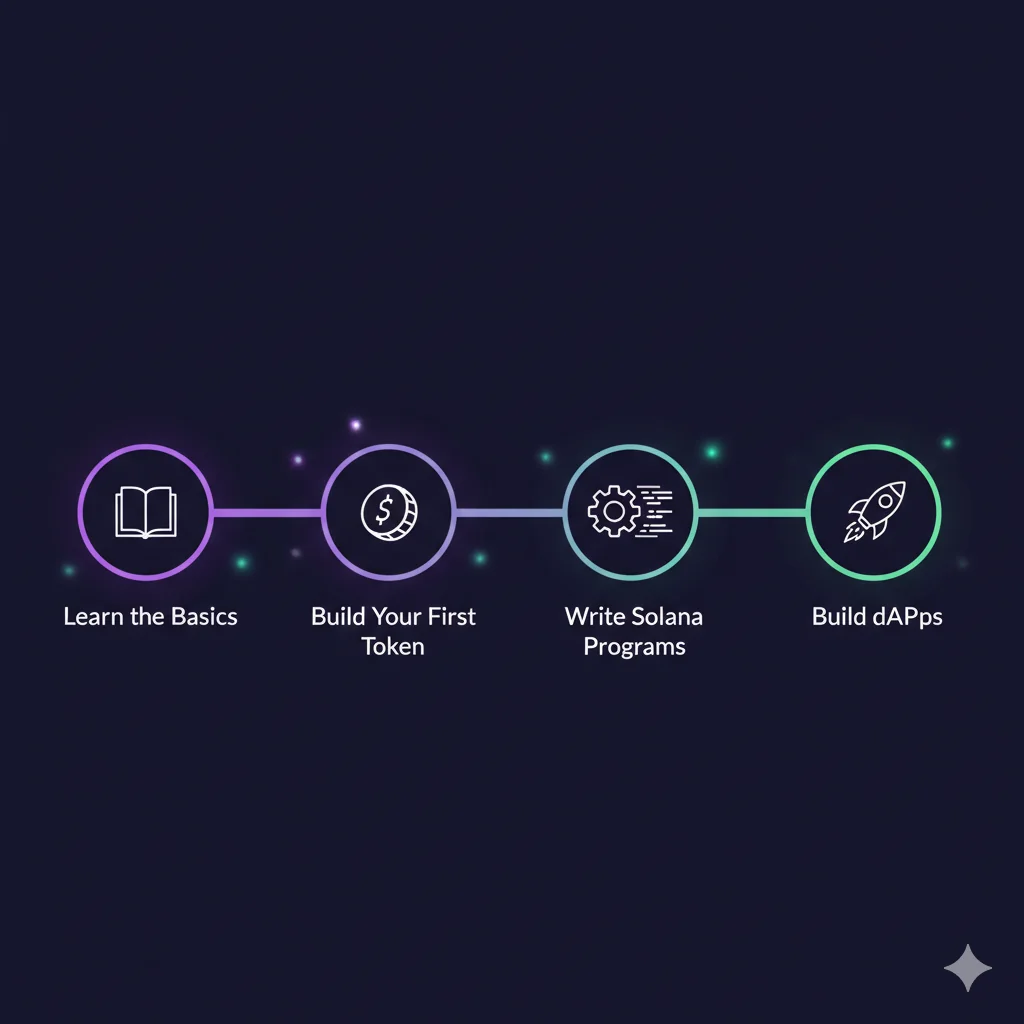
What's Next? Your Solana Journey Continues
You've taken your first steps into Solana development! Here's what you can explore next:
Immediate Next Steps
- Explore Solana Programs: Learn to write smart contracts in Rust
- Build a Token Marketplace: Create a simple DEX for your tokens
- NFT Creation: Mint and trade unique digital assets
- DeFi Protocols: Build lending, staking, or yield farming applications
Advanced Topics to Explore
- Anchor Framework: Solana's developer framework for easier smart contract development
- Program Derived Addresses (PDAs): Advanced account management
- Cross-Program Invocations: Making your programs interact with each other
- Metaplex: The NFT standard and tools ecosystem on Solana
Learning Resources
Troubleshooting Common Issues
Common causes:
- Insufficient SOL balance for transaction fees
- Network congestion (try again in a moment)
- Outdated blockhash (your transaction took too long)
- Account doesn't exist (create it first)
Quick fixes:
- Request more devnet SOL:
solana airdrop 1 - Check network status:
solana cluster-version - Verify your connection:
solana config get
Steps to fix:
- Make sure you have a Solana wallet installed (Phantom, Solflare)
- Set your wallet to Devnet in settings
- Refresh the webpage and try connecting again
- Check browser console for error messages
- Ensure you're serving the HTML file over HTTP (not file://)
Common solutions:
- Kill existing validator processes:
pkill solana-test-validator - Clear ledger data:
rm -rf test-ledger/ - Check port availability:
lsof -i :8899 - Restart with clean state:
solana-test-validator --reset
Conclusion
You've successfully completed your first Solana development journey! From understanding the fundamentals of blockchain and Web3 to setting up your development environment and creating your own token, you've gained hands-on experience with one of the fastest-growing blockchain ecosystems.
Remember: Solana development is rapidly evolving. Stay updated with the latest documentation and community resources!
The skills you've learned today form the foundation for building sophisticated decentralized applications. Whether you want to create the next big DeFi protocol, build innovative NFT experiences, or develop tools for the Solana ecosystem, you now have the knowledge to get started.
Keep experimenting, keep building, and most importantly - have fun exploring the world of decentralized applications!
Want to dive deeper? Join the Solana developer community and start building the future of the internet, one transaction at a time.